Initial Setup
Prerequisites
- server software based on the Bukkit API (CraftBukkit/Spigot/Paper/etc)
- ability to read server logs
- ability to modify server files
Install the plugin
- Put
DiscordSRV-Build-VERSION_NUMBER.jarin the server'spluginsfolder and restart your server (This will generate a folder labeledDiscordSRVwith all the config files) - Open the
config.ymlfile in theplugins/DiscordSRV/folder with your favorite text editor
Setting up the bot
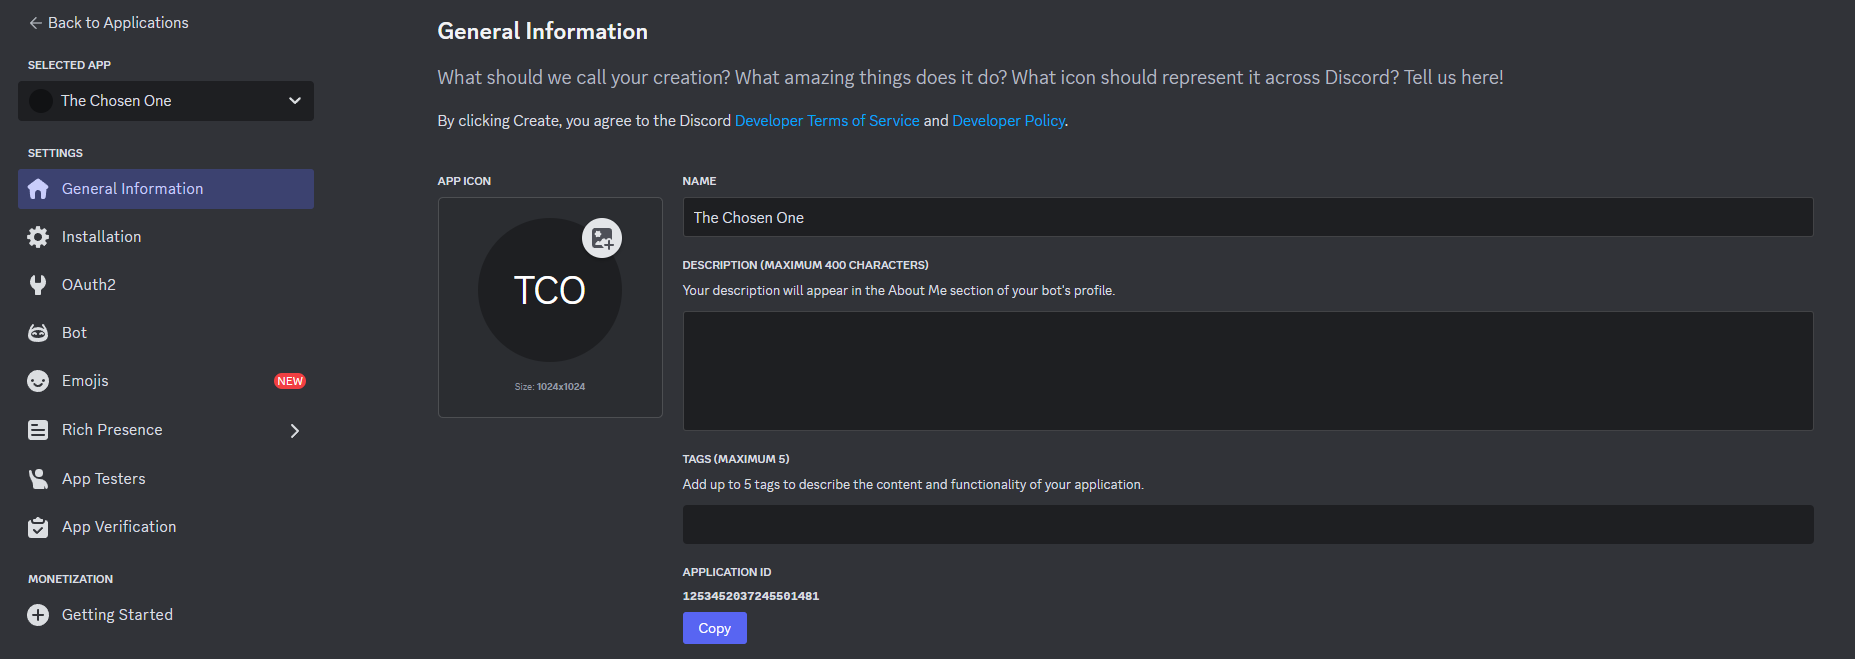
Create the Application
Create a new application at https://discord.com/developers/applications/ by clicking "New Application"
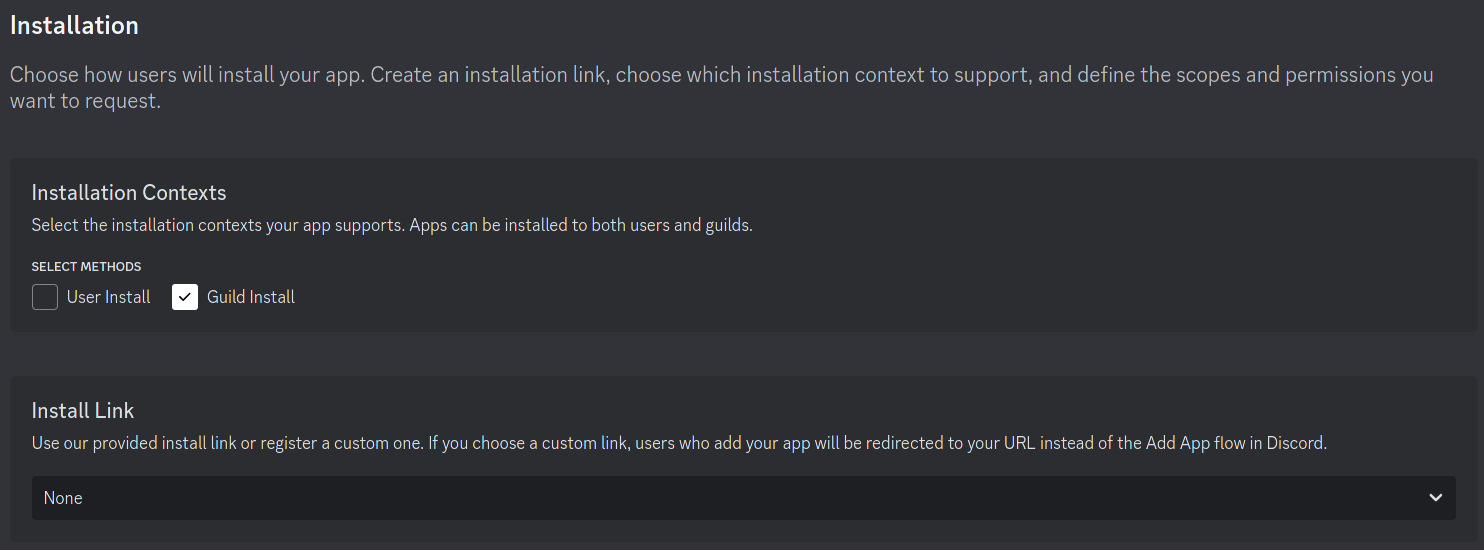
Configure the Installation tab
Open the Installation tab in the left menu, disable the User Install option, and set Install Link to None.
Enable the Privileged Gateway Intents options
Make sure to enable both the SERVER MEMBERS INTENT and MESSAGE CONTENT INTENT options shown in the video below to avoid running into issues with DiscordSRV later on.
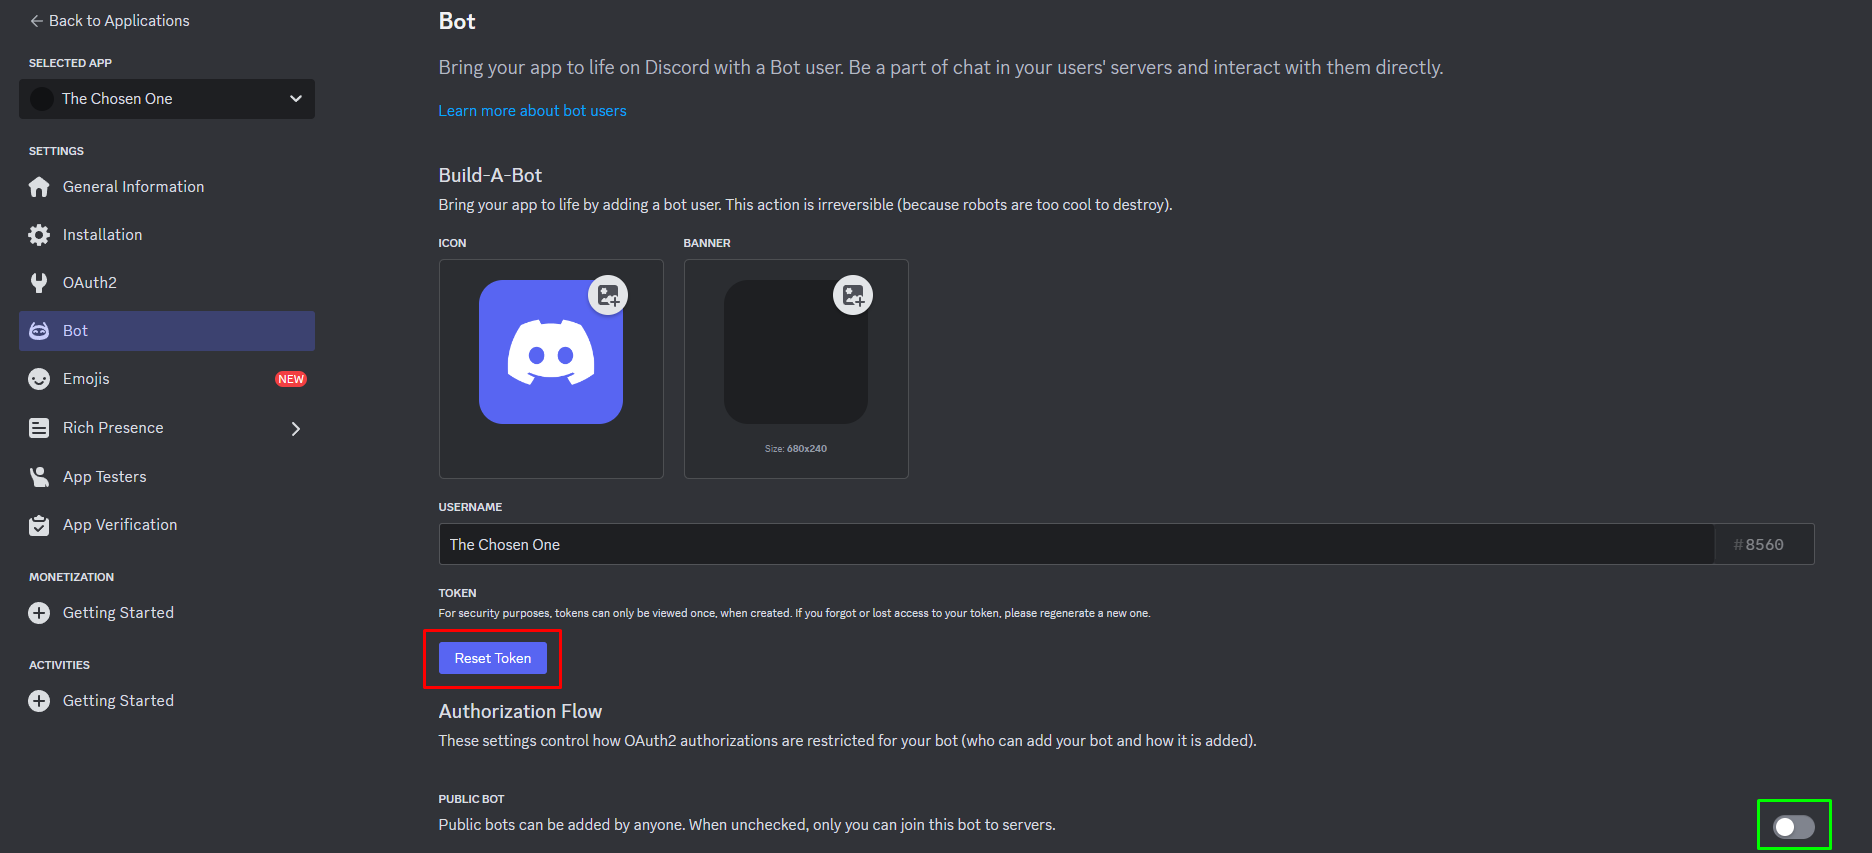
Starting up the bot
Copy the bot token
In order to copy the bot's token, you need to reset it first.
Click the Reset Token of the bot from the application page. Keep PUBLIC BOT unchecked so players cannot invite your bot to their servers.
Paste the token into config.yml
# config.yml Line 8
BotToken: "MjE5NTE5OTk0MDUxMDM1MTQ3.CqTCYw.SFAbKtfK3ydTy1jx2-fTHUJqsPo"
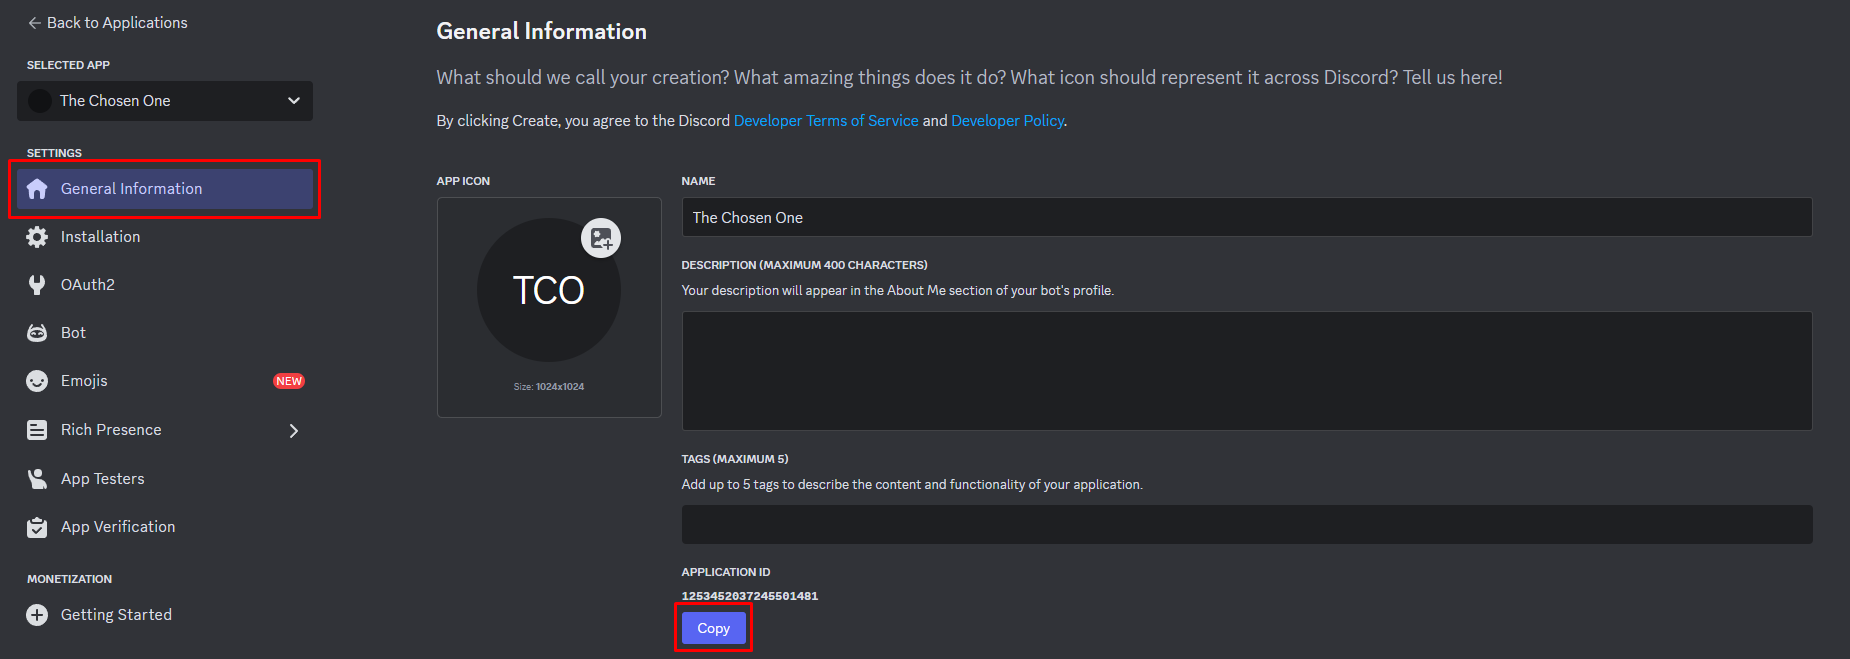
Invite the bot to your guild
Copy the Application ID from the application's General Information page.
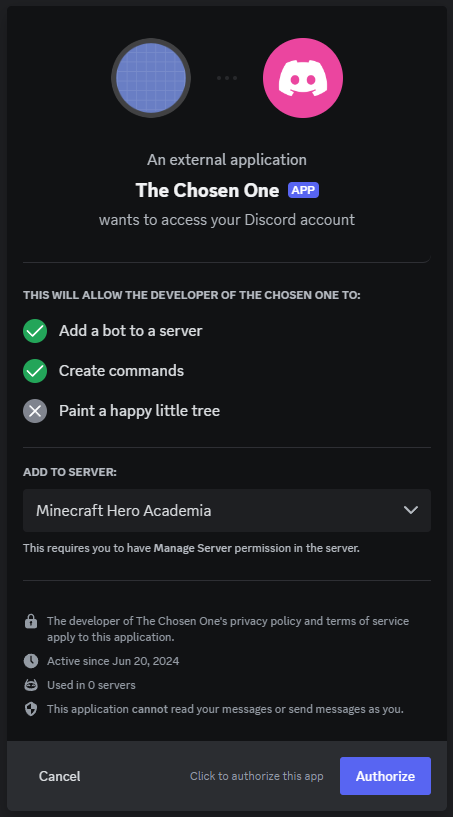
Go to the following URL and paste your Application ID to the page (Ctrl + V): https://scarsz.me/authorize
It loads a small client-side running script which checks for a valid application ID length and redirects back to discord.com for OAuth 2 authorization of your bot. Alternatively, you can manually append the application ID to the end of the following link and open it:
https://discordapp.com/oauth2/authorize?scope=bot+applications.commands&client_id=
Select your guild, then click Authorize
Enable Developer Mode
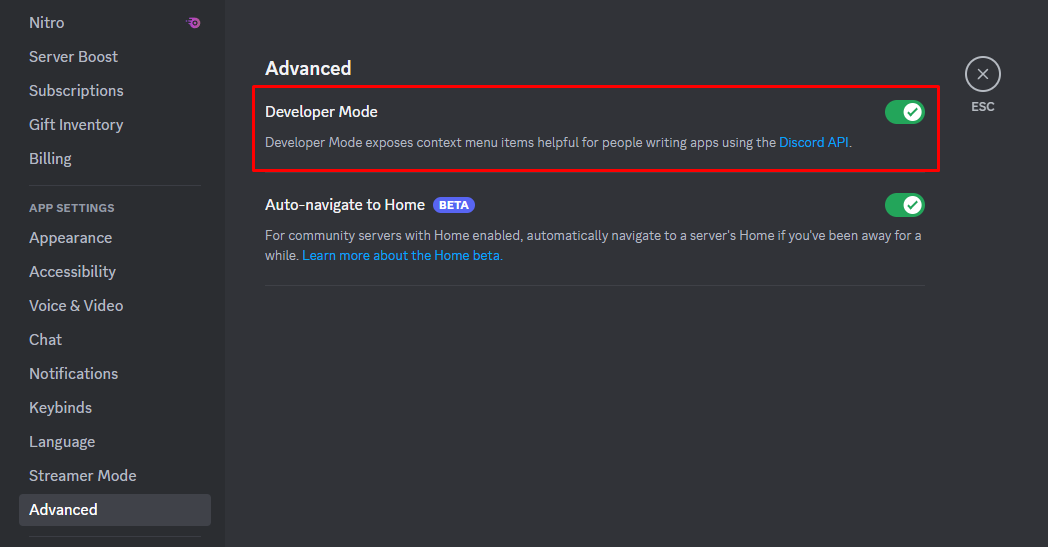
Go to your Discord settings by clicking on the User Settings cog on the bottom left of your Discord.

Go to the Advanced tab and enable Developer Mode
Set up a basic channel relay
Right click the Discord-channel you want to use for chat between Discord and Minecraft and click on Copy ID

Open the config.yml file again.
Search for the option Channels and replace 000000000000000000 with the copied channel ID.
# config.yml Line 14
Channels: {"global": "219559668236681216"}
If you use a chat plugin with channel support like HeroChat, LegendChat, LunaChat, TownyChat or VentureChat, you can set up more channels here with their linked Discord channels. For example, if you want to add an "admin" channel it would look like this:
# config.yml Line 14
Channels: {"global": "219559668236681216", "admin": "221419146028646401"}
Keep in mind that "admin" indicates an ingame channel, not a Discord channel name!
Optionally:
Copy the Channel ID of a second Discord-channel for use as console-channel and paste it into config.yml
# config.yml Line 17
DiscordConsoleChannelId: "219559838890459137"
Give the bot the discord permissions it needs to run
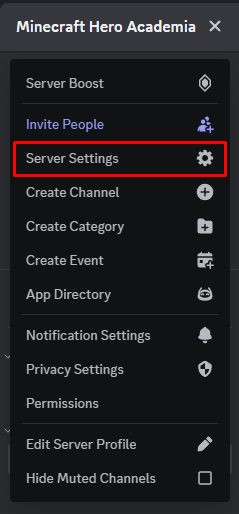
Open your server settings by clicking on the name of your server and choose Server Settings
Go to the Roles tab and create a new role. We've named ours Bot. Add the Administrator permission (or the permissions listed below) to the new role.
Switch to the Members tab and add the new Bot role to your bot by clicking on the + next to the bot's name and choosing the role.
(Re)start your server
You're done with installing DiscordSRV!
Now run through all the config options in config.yml. You'll be surprised with how many features this plugin has
Advanced Information
Giving the bot the administrator permission
Usually it's not recommended to give the bot the Administrator permission, since it gives the bot complete control over your server. We recommend it because it makes the installation process easier on the server owner, and DiscordSRV doesn't do anything that would jeopardize the server. The only way this can be abused is by sharing the bot token with others. Therefore, you should keep the bot token private, and only use it in the context of setting up DiscordSRV. If others were to know your token, they can hijack your bot, so if you suspect the token has been leaked you should reset it immediately in the Discord Developers portal.
However, if you don't feel comfortable with giving the Administrator permission, you can define the following permissions that the bot requires for certain features. This list can/will change and new permissions will need to be added for any new features that require them.
Server Permissions
| Permission | Features |
|---|---|
Manage Roles | role synchronization and adding roles to linked players |
Manage Channels | channel topic updater and the voice module |
Ban Members | ban synchronization |
Manage Nicknames | nickname synchronization |
Manage Webhooks | experimental webhook usage |
| (Server-wide permission is recommended, but can be applied on a per-channel basis) |
Channel Permissions
| Permission | Features |
|---|---|
View Channel and Send Messages | Required for DiscordSRV's channel options (including console and voice lobby), the voice module category and any other channels you want for canned responses |
Manage Messages | when messages are deleted by playerlist & chat channel commands |
Embed Links | optionally for embedding ingame-posted links and required when embed messages are used death, join/Leave |
Mention @everyone, @here and All Roles | for mentioning @everyone if added to allowed mentions in config.yml and mentions enabled |
Add Reactions and Read Message History | for when the bot reacts with "💬" and "❗" to notify a truncated message is being sent from Discord to Minecraft |
Move Members, Mute Members and Manage Permissions | required for the voice lobby and voice category |
Role Hierarchy
Make sure the new Bot role is above any roles you want to synchronize using our role/nickname synchronization system (eg. if you want Moderators names to synchronize, you need to have the Bot role above the Moderator role)